Upload the platform ova file and click “Next”
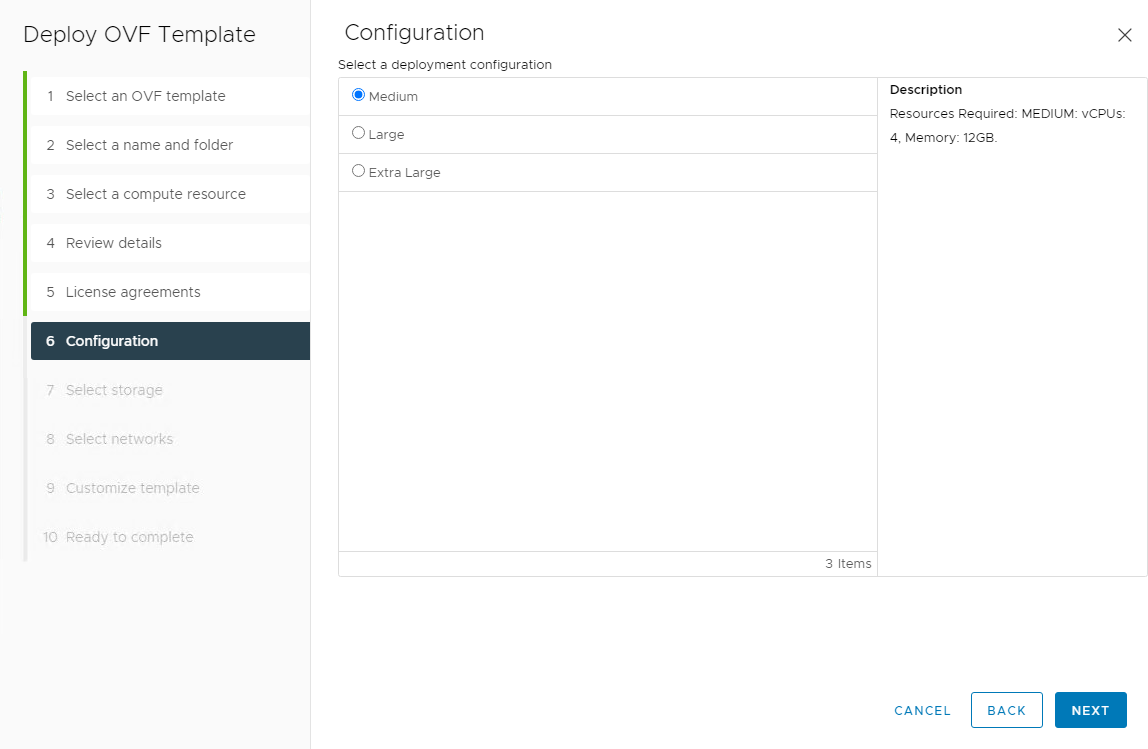
So now we can choose the size we want for me the Medium size is enough.

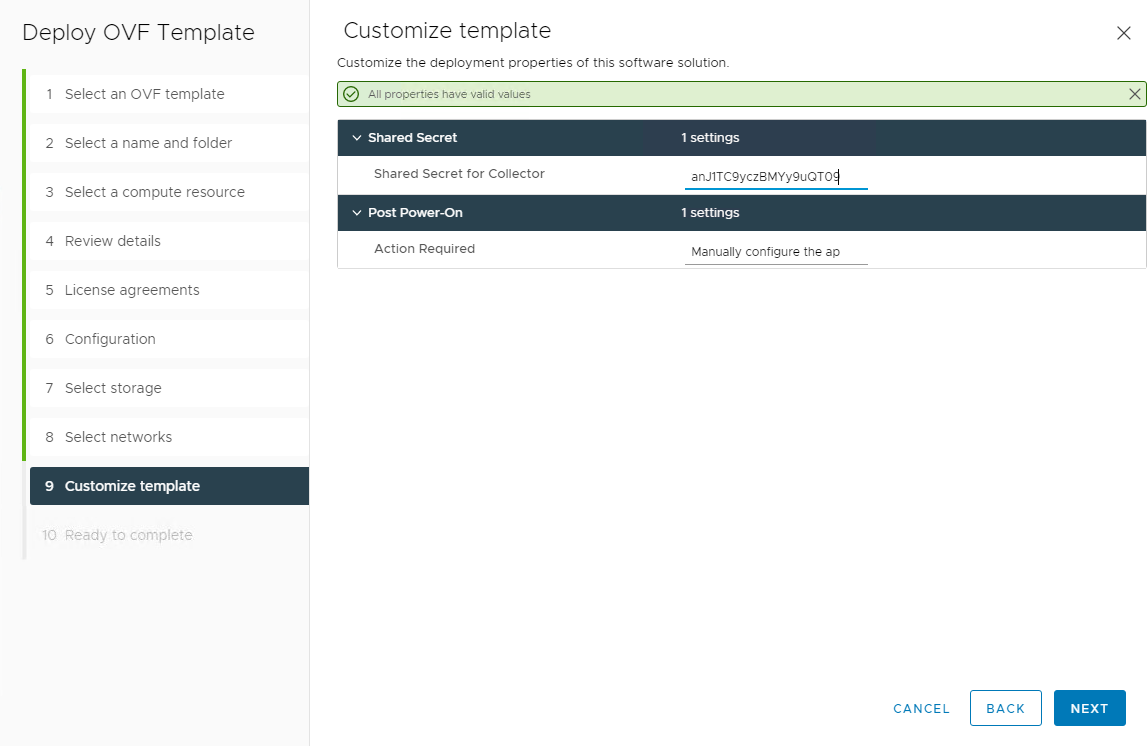
So after you completed step 6, 7 and 8 we now get the note displayed that we need to configure the appliance manually after the deployment. Click “Next”
Now the appliance is deploying which can take a couple of minutes before it’s completed. Then start up the appliance and open an console session on which we can do the configuration. This includes:
- Configuring user accounts
- Network configuration
- NTP configuration
- Web proxy configuration
Log in with the user Consoleuser and password Console.
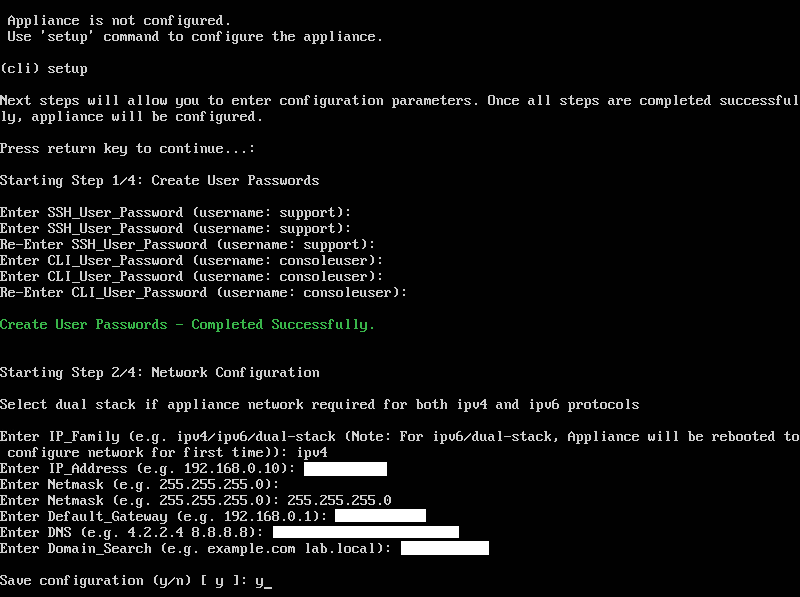
Configuration of step 3 and 4.
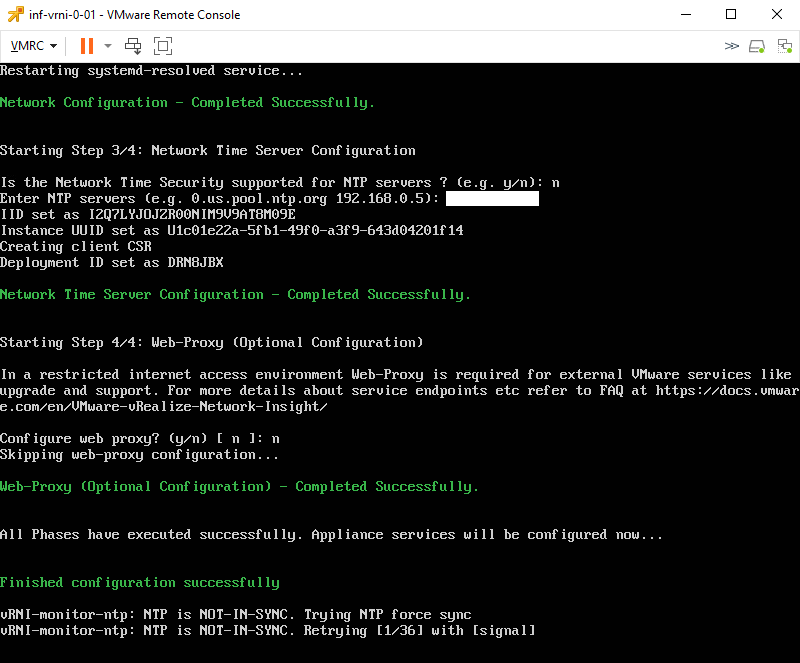
After waiting for a couple of minutes you get the message saying: “Appliance configured successfully”
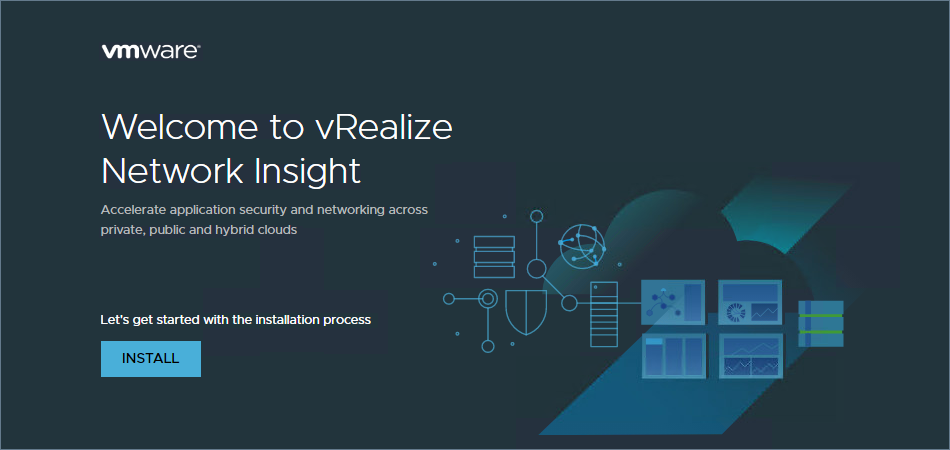
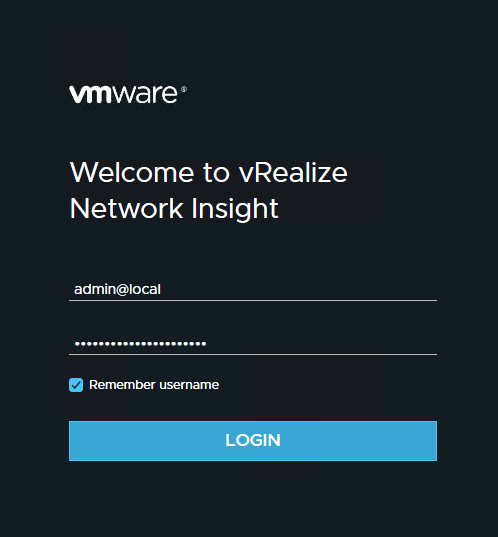
Now we can open the browser and browse to the URL of our appliance. and click on install.
Enter your license and click “Next”

You will be prompted to enter a password for the Admin you will be using later to login with admin@local. When you entered an password click “Activate”

Now click on “Generate” and copy the security key for later. the Installation will wait for the collector VM to come online.

We can now deploy the collector VM. Upload the collector ova file and click “Next”

Again you have to choose a size for the collector VM. For me Medium is big enough.
Now we can enter the Shared secret we copied a few steps ago from the browser. And click “Next”
You have to configure the same steps as with the Collector. Open the console and proceed with the steps. and save the configuration.
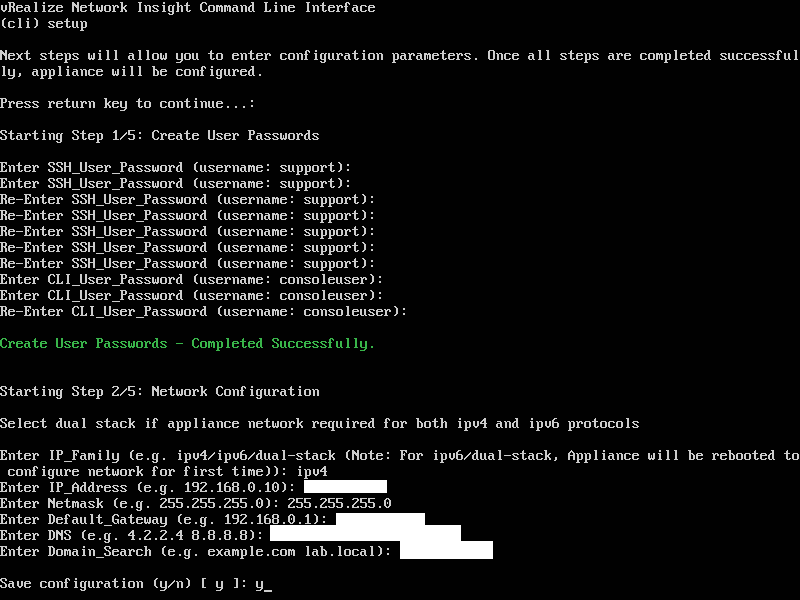
After waiting for a couple of minutes you will get the “Appliance configured successfully” message again

We go back to the web interface and you will see that the proxy has been detected. You can click finish and continue.

Enter your credentials and Login
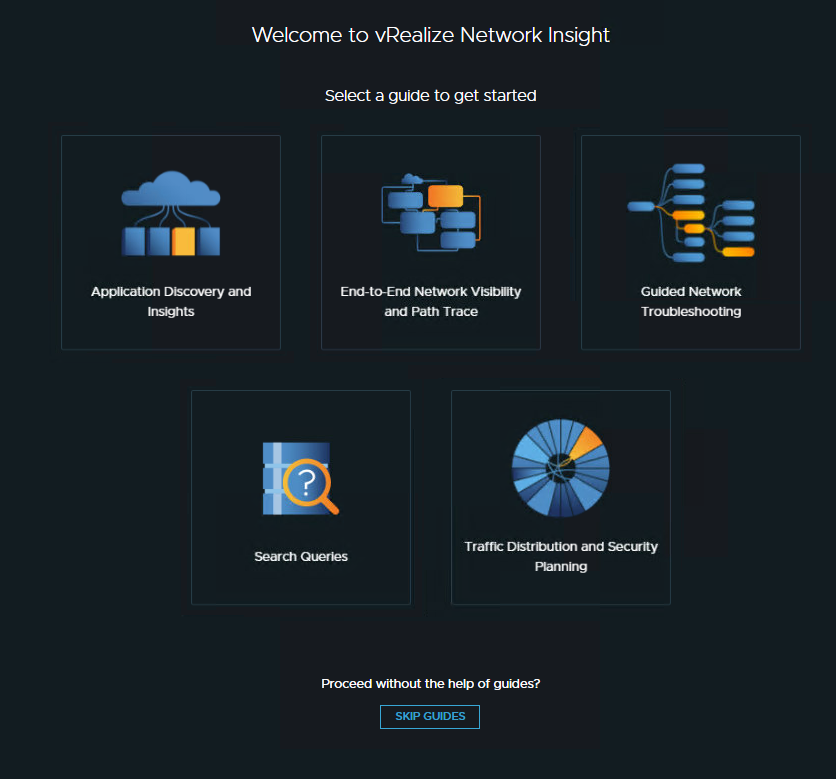
You will get the option to select a guide to get started, which can be useful but I am going to skip the guides for now.
We are shown a page where we can setup a Datasource. I will be showing how to add a vCenter

Enter the IP Adress or FQDN of your vCenter and the credentials. After that click on validate to check if it works. Also I enabled Netflow on the VDS for more detailed logging/information. Also give it a Nickname if you want and add the data source.
